
Fresh wall paint and curated staging furniture capture a buyer’s attention during the first five minutes of a showing, yet they rarely survive the scrutiny of a three-hour home inspection. When prospective buyers walk through a property, they subconsciously look for clues about how the home has been maintained behind the scenes. A faint brown ring on a bedroom ceiling, a sluggish bathroom drain, or an upstairs room that feels ten degrees warmer than the hallway immediately signals deferred upkeep. Once buyers suspect hidden neglect, they either walk away or demand steep repair credits that far exceed the actual cost of fixing the problem.
Smart sellers flip the traditional pre-listing checklist upside down. Instead of spending their entire budget on cosmetic upgrades right before listing, they address structural, moisture, and mechanical fundamentals first. Tackling high-priority interior upkeep from the top of the house down to the subfloors protects your asking price, shortens time on market, and keeps inspection negotiations predictable. Use this practical framework to focus your renovation dollars on the interior improvements that deliver measurable returns at closing.
Stop Overhead Moisture Before It Ruins Ceilings and Drywall
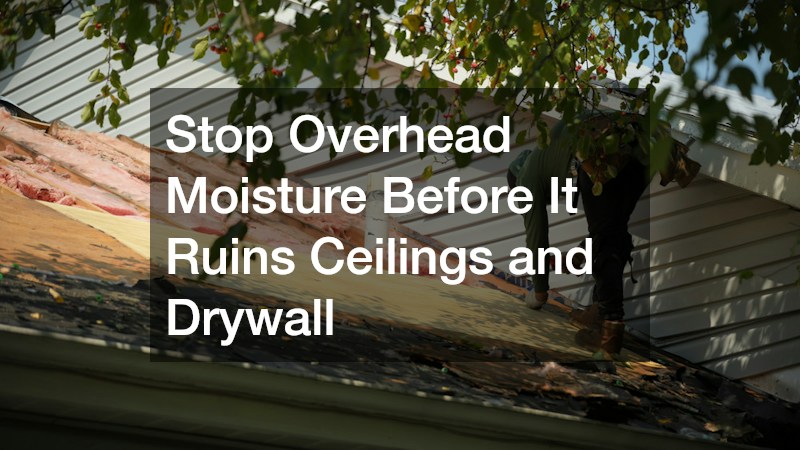
Water intrusion is one of the fastest ways to derail a real estate transaction. Even a minor, long-resolved stain on a ceiling can trigger alarm bells for buyers, home inspectors, and appraisers, leading to demands for invasive testing or price reductions. Before picking up a paintbrush to refresh interior ceilings, verify that the building envelope above them is completely watertight.
Start your pre-listing walkthrough by looking up in every room, paying close attention to areas overlooked during daily routines. Use a bright flashlight to inspect ceilings inside upstairs closets, around attic access panels, along exterior wall junctions, and near chimney chases or skylights. Moisture rarely travels straight down; water often enters along a roof slope, runs along a rafter, and pools several feet away from the entry point.
Watch for these early warning signs of overhead moisture issues:
- Yellowish or copper-colored rings: These typically indicate mineral deposits left behind by slow, intermittent water intrusion from above.
- Bubbling paint or sagging drywall tape: Trapped moisture behind latex paint breaks the bond with the gypsum board, causing blisters, peeling strips, or swollen seams.
- Musty odors in upper-level closets: Enclosed spaces without active air registers trap humidity, making them the first places where damp drywall develops noticeable odors.
- Dampness detected with a moisture meter: Home inspectors scan discolored ceiling spots with electronic meters; painting over active dampness with stain-blocking primer will not fool diagnostic tools.
Whenever you spot interior ceiling discoloration or softened drywall, resist the urge to patch the interior first. Schedule an evaluation with a licensed roofing contractor to inspect flashing around chimneys, plumbing vent boots, valley seams, and ridge vents. Addressing the exterior entry point ensures your interior cosmetic work will not be ruined by the next heavy rainstorm.
Once the exterior problem is resolved, keep every itemized invoice, photograph, and transferable warranty on file. Showing a buyer proof of professional roof repairs turns a potential red flag into evidence of responsible ownership. Only after the framing above is thoroughly dry should you cut out compromised gypsum board, install new drywall patches, blend the surrounding ceiling texture, apply a shellac or oil-based stain-blocking primer, and repaint the entire ceiling plane from corner to corner for a seamless finish.
Seal Air Leaks and Upgrade Thermal Barriers for Lower Utility Bills

Modern homebuyers pay close attention to ongoing operating costs, frequently requesting twelve months of utility bills before submitting an offer. Drafty rooms, uneven temperatures between floors, and winter ice dams tell buyers that conditioned air is escaping upward. Improving your home’s thermal boundary is one of the highest-returning upgrades you can make before listing, often recouping more than its installation cost in added resale value.
Before adding new thermal material, stop conditioned indoor air from leaking upward through bypasses in your ceiling plane. Warm air naturally rises, creating pressure that pushes heated or cooled air through unsealed gaps around wiring, plumbing stacks, and light fixtures.
Focus your interior air-sealing efforts on these high-leakage zones:
- Attic hatches and pull-down stairs: Uninsulated scuttle covers and louvered staircases act like open windows in your ceiling. Attach rigid foam board to the back of the hatch and install compressible weatherstripping around the frame to create an airtight seal.
- Recessed ceiling lights: Older, non-insulation-contact recessed cans allow substantial conditioned air to escape upward. Retrofit them with airtight LED trim kits or install fire-rated airtight covers over the housings from above.
- Top plates and utility penetrations: Apply expanding polyurethane foam or fire-block caulk around electrical cables, plumbing vent pipes, and exhaust fan housings where they penetrate the upper ceiling.
Once air leaks are sealed, measure the depth of the existing thermal barrier above your living space. If you can see the tops of your ceiling joists, your home is under-insulated by modern building standards. For straightforward top-ups in accessible spaces, handy homeowners can purchase unfaced fiberglass batts or loose-fill bags directly from local insulation suppliers to bring levels up to Department of Energy recommendations for their climate zone.
However, if your attic contains cramped eaves, damp or pest-damaged material, or unvented soffits, hiring experienced attic insulation contractors is the safer, cleaner route. Professionals install rigid air-chute baffles along the eaves to preserve soffit ventilation, extract compromised material if necessary, and blow in uniform layers of high-density fiberglass or cellulose. Presenting buyers with upgraded R-values and lower monthly energy bills gives your listing a clear competitive edge.
Optimize Climate Control and Panel Capacity for Modern Comfort
A home’s mechanical core operates mostly out of sight, yet buyers experience its performance every second they spend inside your property. Loud mechanical rattles, stale indoor air, or a dated electrical panel with illegible labels create immediate anxiety about big-ticket replacements after closing. Proactive servicing and targeted capacity upgrades reassure buyers that the house runs smoothly and safely.
During showings, buyers notice how a house feels and sounds. If a furnace blower whines loudly, air vents are coated in dust, or upstairs bedrooms feel stuffy compared to the main floor, buyers will mentally deduct thousands of dollars from their offer to cover a new climate system.
Take these practical steps to optimize indoor comfort and mechanical presentation:
- Schedule a comprehensive pre-listing tune-up: Hire reputable HVAC companies to clean evaporator and condenser coils, clear condensate drain lines, test refrigerant pressures, and inspect heat exchangers. Attach the dated service tag directly to the air handler so inspectors and buyers see recent professional care.
- Seal accessible ductwork joints: Walk through your basement or utility closet with the fan running and feel for air escaping at metal duct seams. Sealing leaky joints with foil-backed mastic tape or brush-on mastic improves airflow to distant bedrooms without expensive equipment changes.
- Refresh visible interior registers: Replace bent, rusted, or painted-shut floor and wall grilles with crisp metal registers, and install a fresh pleated air filter before listing photos are taken.
Beyond heating and cooling, home inspectors spend substantial time with the dead-front cover removed from your main electrical panel, and electrical write-ups are among the most common triggers for repair negotiations. Common interior issues include double-tapped breakers, missing knock-out covers, ungrounded two-prong receptacles in older bedrooms, and flickering dimmer switches caused by incompatible LED bulbs.
Bring in a licensed electrician ahead of your listing date to correct panel defects, replace worn receptacles, and ensure every circuit breaker is clearly typed on the panel directory. If your home still relies on a maxed-out 100-amp service panel or contains legacy wiring hazards, addressing those limitations upfront prevents buyers’ insurance carriers from delaying closing or demanding escrow holdbacks.
Eliminate Hidden Water Damage and Modernize Wet-Area Safety

Kitchens, bathrooms, and laundry rooms sell homes, but they are also the primary sites of hidden interior water damage and electrical code violations. Home inspectors routinely run every faucet simultaneously, flush every toilet multiple times, and shine bright lights inside every vanity cabinet to check for slow drips and moisture staining.
Open every sink cabinet in your home and examine the connections underneath. Green oxidation on copper shutoff valves, brittle braided supply hoses, warped cabinet bottoms, and slow-draining basins signal deferred upkeep that buyers scrutinize closely.
Prioritize these high-impact wet-area maintenance tasks:
- Upgrade seized shutoff valves: If an under-sink angle stop refuses to turn smoothly, it will likely leak when an inspector tests it. Have local plumbing services replace old multi-turn compression valves with quarter-turn ball valves and stainless-steel braided supply lines.
- Eliminate running toilets and sluggish drains: Replace worn flapper valves and fill assemblies inside toilet tanks, clear hair and soap buildup from P-traps, and verify that sink stoppers seal and drain briskly.
- Refresh perimeter caulking and flush the water heater: Strip away cracked, discolored caulk along tub surrounds, shower corners, and kitchen backsplashes, replacing it with mildew-resistant 100 percent silicone. Flushing sediment from your water heater tank also reduces popping noises and extends its service life.
Along with dry plumbing, moisture management and crisp illumination dramatically elevate how buyers perceive wet areas. If a bathroom exhaust fan roars loudly yet barely pulls steam off the mirror—or vents directly into the attic rather than outdoors—buyers will worry about hidden mold growth behind walls and ceilings. Similarly, dim fluorescent light boxes in the kitchen make clean cabinetry feel dated.
Work with a qualified electrical installer to swap noisy, underpowered bath fans for quiet, high-CFM models equipped with humidity sensors, and replace outdated kitchen fixtures with warm, high-CRI recessed LED lighting and under-cabinet task strips. Verify that every receptacle within six feet of a sink, bathtub, laundry tub, or wet bar has a functioning Ground Fault Circuit Interrupter (GFCI) outlet, as missing wet-zone protection is an automatic flag on inspection reports.
Restore Worn Interior Surfaces and Eliminate Structural Squeaks

Once your ceilings, attic envelope, mechanical systems, and wet zones are sound, turn your attention to the surfaces buyers touch and walk across during showings. Flooring occupies the largest visual footprint in any room, and tactile cues beneath a buyer’s feet heavily influence their perception of build quality.
Authentic hardwood floors consistently rank near the top of buyer wish lists, commanding stronger offers and faster sales than synthetic alternatives or wall-to-wall carpeting. Sellers sometimes try to hide pet scratches, sun fading, or water rings near exterior doors by laying inexpensive carpet over solid wood planks. Experienced buyers and inspectors spot this immediately and view it as a liability rather than an upgrade.
Instead of covering worn planks, consult an experienced floor contractor to evaluate the remaining wear layer of your wood surfaces. If the finish is merely dull with light scuffs, a budget-friendly screen-and-recoat buffs the existing polyurethane and applies a fresh topcoat in one day without sanding to bare wood. For deeper gouges or dark stains, a full sand-and-stain restoration—including weaving in matching replacement boards—transforms tired rooms into showcase spaces. Choose timeless neutral stain tones and a satin sheen, which hides minor dust and footprints better than high-gloss finishes during open houses.
Even freshly refinished surfaces lose their appeal if every step produces loud squeaks or spongy movement. Creaking stair treads, shifting subfloor seams, and gapped transition strips make buyers wonder if underlying floor joists are compromised.
Before final touch-up painting, walk every hallway and staircase methodically to eliminate movement and trim gaps:
- Silence squeaky subfloors and stairs: Drive countersunk trim-head screws through squeaky subfloor panels into the joists below, or apply construction adhesive and shims from the basement where joists are exposed.
- Tighten thresholds and transition strips: Secure loose metal or wood transition moldings between tile and wood rooms so nothing clicks or shifts underfoot.
- Caulk trim shrinkage gaps: Run a clean bead of paintable acrylic caulk along the top edge of baseboards and door casings where seasonal movement has left dark shadow lines.
Approaching home preparation in a logical sequence prevents wasted effort and protects your renovation budget. By stopping overhead moisture first, sealing your attic envelope, servicing core heating and electrical systems, resolving wet-area plumbing and safety items, and restoring quiet, solid floors last, you ensure every dollar builds lasting equity rather than masking underlying issues.
As you complete each project, organize every invoice, inspection report, permit sign-off, and warranty transfer into a clean binder on the kitchen counter during showings. That tangible record of proactive care gives buyers the confidence to submit strong offers—and ensures you walk away from closing with maximum return.