Outdoor cooking has experienced a dramatic evolution over the past decade. What once consisted of a simple charcoal grill on a patch of grass has transformed into a fully integrated, architectural extension of the home. Homeowners now look to blur the boundaries between interior living areas and exterior environments. Modern design in these spaces is defined by clean lines, high functionality, seamless transitions, and true multi-season usability. Achieving this sophistication requires more than just purchasing high-end appliances; it demands meticulous planning, an understanding of spatial dynamics, and a commitment to utilizing materials that can withstand nature’s harsh realities. Building a high-end exterior culinary space involves the strategic layout of functional zones, the careful selection of weather-resistant finishes, and the integration of hidden utility systems that power the space without compromising its aesthetic appeal. By approaching your remodel with the same rigorous attention to detail applied to an interior renovation, you create a luxurious, highly functional environment serving as the ultimate destination for entertaining, relaxing, and cooking year-round.
Map Out the Cooking, Prep, and Social Zones to Optimize Traffic Flow

A flawless exterior cooking space begins with a thoughtful layout prioritizing culinary efficiency and social interaction. Just as interior culinary spaces rely on the classic “golden triangle” dictating the relationship between the stove, sink, and refrigerator, your exterior space must adhere to proven ergonomic principles. You want to minimize the distance walked while carrying hot pans, while keeping guests safely out of the primary cooking path.
Establishing a solid footprint is the crucial first step. A beautiful layout quickly fails if the ground beneath it shifts, sinks, or cracks after a single winter of freezing and thawing temperatures. Bringing in professional concrete services is essential to pour a perfectly leveled, structurally sound, properly graded patio foundation. This dense base ensures heavy masonry islands and premium appliances remain perfectly plumb over time, preventing uneven cooking surfaces. Once the foundation is set and fully cured, begin defining the physical borders of your backyard kitchen.
Consider the following techniques for optimizing your layout and traffic flow:
- Create clear physical boundaries using bar seating or L-shaped islands. This design keeps guests comfortably engaged with the chef while ensuring they remain safely away from open flames and hot surfaces.
- Position the primary grill downwind from your main seating areas to prevent smoke from blowing directly into the faces of your guests during dinner parties.
- Allocate at least thirty-six inches of continuous counter space adjacent to the grill for food preparation and resting hot trays.
- Designate a refrigeration zone near the perimeter of the space. This allows guests to grab cold beverages without crossing through the chef’s active workspace, preventing bottlenecks.
Opt for Heat-Resistant, UV-Stable, and Non-Porous Surfaces
Selecting the right materials is arguably the most critical design decision. Unlike interior spaces benefiting from climate control, exterior structures face relentless exposure to ultraviolet radiation, torrential rain, and extreme temperature fluctuations. To maintain a modern, pristine aesthetic, you must prioritize materials specifically engineered to withstand these environmental stressors.
Modern outdoor cabinetry has moved far beyond traditional wood, which is highly susceptible to moisture rot and temperature warping. Instead, designers now utilize marine-grade polymer, powder-coated stainless steel, and high-density polyurethane to build weather-proof frames. For horizontal surfaces, avoiding porous natural stones and UV-sensitive composites is paramount. While quartz is highly popular indoors, the resins used to bind it quickly yellow and degrade when exposed to direct sunlight. Alternatively, porcelain and sintered stone offer incredible durability, zero porosity, and absolute UV stability. When installing these high-end materials, it is vital to work with an experienced countertop installer who understands outdoor-rated adhesives and the critical need for expansion joints to prevent winter cracking.
Beyond the countertops, architectural cohesion should be a primary goal. The new structure should feel like a natural, seamless extension of your home’s existing architecture rather than a disconnected afterthought.
- Match the masonry, stucco, or stone veneer of your new island to the dominant exterior textures of your main residence.
- If your home features distinctive wood or fiber-cement cladding, consider utilizing siding services to clad the base of your island in a matching, weather-treated material.
- Specify stainless steel hardware and hinges for all doors and drawers to prevent rust and corrosion, ensuring that the moving parts of your cabinetry function smoothly for decades.
- Choose a matte or honed finish for your surfaces rather than high-gloss options, as matte finishes reduce blinding glare from the midday sun and are significantly easier to keep looking clean.
Install Task and Ambient Lighting on Separate Circuits for Evening Functionality
A modern entertaining space does not shut down when the sun sets. Implementing a strategic, tiered lighting and power plan is essential for extending the usability of your space deep into the night while maintaining safety and ambiance. A single, glaring floodlight mounted to the house is no longer sufficient; modern exterior design requires a nuanced approach to illumination.
Your lighting plan should separate task lighting from ambient lighting. Task lighting must be bright and focused, specifically illuminating primary work zones like grill grates, prep sinks, and cutting boards. Ambient lighting should be soft, warm, and indirect, designed to highlight architectural features and provide safe navigation along pathways. Because exterior environments present unique electrical hazards due to moisture exposure, hiring a licensed electrician is a strict, non-negotiable requirement for any serious renovation. They will ensure all installations meet stringent outdoor safety codes and municipal regulations.
When designing your electrical layout, consider these crucial technical requirements:
- Ensure outlets and switches are installed in weatherproof, GFCI-protected enclosures to prevent the risk of electric shock during rainstorms or pressure washing.
- Install dedicated circuits for high-demand appliances. Outdoor refrigerators, ice makers, and electric pizza ovens draw significant amperage, and placing them on shared circuits inevitably leads to tripped breakers.
- Incorporate smart lighting controls. Wi-Fi-enabled dimmers allow you to adjust the space’s mood directly from your smartphone, transitioning from bright cooking light to a soft, romantic glow for dining.
- Utilize LED strip lighting beneath countertop overhangs to cast a grazing light down the face of your cabinetry, adding depth and visual interest to the masonry.
Pitch Your Hardscaping and Prep Stations to Prevent Water Pooling
Integrating reliable water and drainage systems elevates an ordinary grilling station into an independent culinary center. The ability to wash vegetables, rinse hands after handling raw meat, and fill stockpots without constantly running back inside the house is a game-changer for outdoor entertaining. However, introducing plumbing to an exterior environment requires rigorous planning to prevent catastrophic freeze damage and manage environmental runoff.
Bringing in professional plumbing services early in the design phase is critical. An expert will know exactly how deep to trench the hot and cold supply lines to ensure they remain safely below your local frost line. Furthermore, they will install accessible, low-point winterization valves that allow you to completely drain and blow out the lines before the first hard freeze of the season.
Equally important is managing the water after it leaves the sink, as well as handling the natural rainwater that hits your new patio. Consider these essential water management strategies:
- Ensure that all horizontal hardscaping surfaces are pitched slightly away from the home’s foundation. A slope of one-quarter inch per foot is generally sufficient to prevent water from pooling around your cooking stations.
- Collaborate with landscaping services to integrate functional drainage solutions around the perimeter of the patio. Incorporating French drains, bioswales, or permeable paving stones ensures that excess stormwater and sink runoff are safely absorbed or redirected.
- Consider installing a dedicated drop-in ice bin with a built-in drain. This allows you to keep beverages cold all day, while the melting ice automatically drains away without creating puddles on the deck.
- If connecting to your municipal sewer system is geographically impossible due to the grade of your yard, discuss installing a specialized dry well system specifically designed to handle greywater from the outdoor sink.
Conceal Fuel Connections to Maintain a Minimalist Aesthetic
Securing a safe and powerful fuel source drives your exterior culinary space. The modern aesthetic relies on minimalism, meaning bulky hoses and visible fuel containers must be hidden from view. How you manage fuel connections impacts both the look and safety of your setup.
For those not hard-piping appliances into the municipal supply, liquid propane is the standard alternative. A modern design cannot feature a rust-prone tank sitting on the patio. The solution involves designing custom, ventilated cabinetry with heavy-duty slide-out drawers holding large propane tanks completely out of sight. Conversely, if you are tapping into your home’s existing natural gas infrastructure, the project becomes more complex. You must have a professional evaluate the system to confirm it has sufficient BTU capacity to support your new, high-demand appliances. If the infrastructure is aging, completing necessary gas line repairs and upgrading pipe diameter ensures optimal grill performance and adherence to modern safety codes.
Follow these guidelines for safe and aesthetically pleasing fuel integration:
- Always install stainless steel ventilation panels in any cabinet housing gas connections or tanks. Because propane is heavier than air, it can pool dangerously in unventilated enclosures if a leak occurs.
- Include an emergency shut-off valve that is easily accessible but aesthetically integrated, allowing you to instantly cut the fuel supply without having to reach directly behind a flaming grill.
- If running new underground gas lines from the house to an island, ensure the trenching route avoids major tree roots and is marked with subterranean warning tape to prevent future accidental digging punctures.
- For wood-fired appliances like traditional pizza ovens, build dedicated, waterproof masonry alcoves specifically dimensioned to stack and dry hardwood, turning the fuel source itself into a visually appealing design element.
Build Adjustable Shade and Wind Blocks to Extend Your Entertaining Season
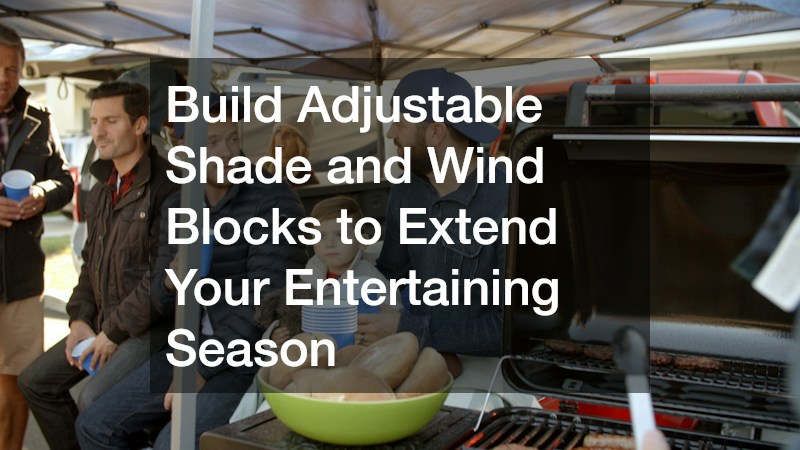
An investment in an exterior living space should yield returns for more than just three months a year. Designing for multi-season comfort requires proactive strategies to mitigate extreme heat, wind, and dropping temperatures. Incorporating dynamic climate control elements creates a microclimate that keeps guests comfortable from early spring through late autumn.
Modern design favors adaptable solutions over static ones. Fixed, solid roofs can sometimes make a patio feel dark and trapped, whereas adjustable structures allow you to control the exact amount of elemental exposure. Motorized retractable awnings are a sleek solution, extending with the push of a button to provide shade during the midday sun, then hiding away into a slim cassette housing when you want to dine beneath the stars. Alternatively, smart louvered pergolas feature aluminum slats that can rotate to block direct sunlight or close completely to create a waterproof barrier during a sudden rainstorm.
To further extend your entertaining season, consider these climate control enhancements:
- Integrate flush-mounted, short-wave infrared ceiling heaters into your overhead structures. Unlike traditional mushroom heaters that simply heat the air, infrared technology warms the objects and people directly beneath them, making them highly effective even on breezy nights.
- Install modern, smokeless fire features, such as a linear gas fire pit integrated into a coffee table. This provides both critical evening warmth and a mesmerizing focal point for post-dinner socializing.
- Utilize tempered glass balustrades or strategically dense evergreen plantings to create effective wind blocks on the sides of the patio that receive the most prevailing crosswinds.
- Incorporate outdoor-rated ceiling fans above the primary dining and seating areas to create a gentle, cooling breeze that also serves the dual purpose of keeping mosquitoes and other flying insects away from your guests during humid summer evenings.
Transforming a backyard into a premier culinary destination requires a harmonious blend of visionary design and rigorous technical execution. By prioritizing a logical traffic flow, selecting materials engineered for extreme endurance, and integrating robust electrical and plumbing systems, you guarantee the creation of a space that is structurally durable and visually stunning. Every detail matters, from the structural integrity of the foundation pour to the concealment of fuel lines and inclusion of dynamic climate control features. Ultimately, a well-executed exterior space does significantly more than increase your property’s market value; it fundamentally changes the way you cook, entertain, and experience the comforts of your home. The transition from concept to reality begins with careful planning. Start sketching your layout, gather inspiration for material palettes, and begin assembling a team of experienced professionals to bring your ultimate outdoor vision to life.